TrueSecure Guide
  • Getting Started
  • Backup Format Overview
    • Hybrid Backup
    • Object Lock (Immutability)
    • MS SQL Server Backup
    • MS Exchange Backup
    • Synthetic Backup
    • About GFS
      • Configure GFS Policy
        • GFS Retention Policy Settings in CLI
      • GFS Policy Usage Examples
      • F.A.Q
    • Forever Forward Incremental Backup
      • Intelligent Retention
    • Client-Side Deduplication
    • Mandatory and Full Consistency Checks
    • Retention Policy
    • File And Folder Backup
      • OneDrive Backup
      • System and Hidden Files Backup
    • Image-Based Backup
    • Full Backup Explained
    • VMware Backup Plan
      • Application-Consistent Backups
      • Pre-Freeze and Post-Thaw Scripts
      • Transaction Logs Processing in Application-Consistent Backups
      • Prepare Guest VM for Application-Consistent Backup
      • Changed Block Tracking for VMware Backups
    • About Hyper-V Backup
      • Hyper-V Virtual Machine Backup
      • Hyper-V Failover Cluster Backup
      • Application-Consistent Backups
      • Prepare Guest VM for Application-Consistent Backup
      • Changed Block Tracking for Hyper-V Backups
    • Legacy Backup Format
      • Backup Format Comparison
      • Hybrid Backup
      • Synthetic Full Backup (Legacy Backup Format)
      • Synthetic Backup for S3-compatible Storage Accounts
      • File-Level Backup (Legacy)
        • Step 1. Backup Route
        • Step 2. Backup Destination (for Local or Cloud Backup)
        • Step 3. Backup Destinations (for Hybrid Backup)
        • Step 4. Plan Name
        • Step 5. Advanced Options
        • Step 6. Backup Source
        • Step 7. Network Shares
        • Step 8. Advanced Filter
        • Step 9. Compression and Encryption Options
        • Step 10. Schedule
        • Step 11. Recurring Schedule
        • Step 12. Retention Policy
        • Step 13. Pre / Post Actions
        • Step 14. Email and System Log Notifications
        • Step 15. Summary
      • Image-Based Backup (Legacy)
        • Step 1. Backup Route
        • Step 2. Backup Destination
        • Step 3. Backup Destinations (for Hybrid Backup)
        • Step 4. Plan Name
        • Step 5. Select Partitions
        • Step 6. Advanced Options
        • Step 7. Compression and Encryption Options
        • Step 8. Retention Policy
        • Step 9. Schedule
        • Step 10. Specify Recurring Schedule
        • Step 11. Pre / Post Actions
        • Step 12. Notifications and System Log Settings
        • Step 13. Summary
      • VMware Backup (legacy)/Step 1. Select the Backup Route
        • Step 2. Select Backup Storage
        • Step 3. Specify the Plan Name
        • Step 4. Select VMware Host Server
        • Step 5. Select Virtual Machines
        • Step 6. Select Virtual Disks
        • Step 7. Compression and Encryption Options
        • Step 8. Retention Policy
        • Step 9. Schedule
        • Step 10. Schedule Full Backup
        • Step 11. Pre / Post Actions
        • Step 12. Notification
        • Step 13. Summary
      • Hyper-V VM Backup (legacy)/Step 1. Backup Route
        • Step 2. Select Backup Storage
        • Step 3. Plan Name
        • Step 4. Select Virtual Machines
        • Step 5. Select Virtual Disks
        • Step 6. Compression & Encryption Options
        • Step 7. Retention Policy
        • Step 8. Schedule
        • Step 9. Advanced Recurring Schedule
        • Step 10. Pre / Post Actions
        • Step 11. Notification
        • Step 12. Summary
    • Backup for Microsoft 365 / Google Workspace
      • Get Started with Backup for Microsoft 365 / Google Workspace
      • Manage Microsoft 365 Backup/ Service Dashboard
        • Account Settings
        • Manage Users
        • Create Mail Archive
        • Export to PST
      • Backup and Restore
        • Outlook Mail Backup
        • Back Up OneDrive
        • Contacts Backup
        • Back up Calendar
        • SharePoint Backup
        • Back up Microsoft Teams
        • Retention Policy in Microsoft 365 Backup
      • Google Backup/Account Setting
        • Manage Google Backup
        • Manage Users
        • Auto-Activate New Users
        • Backup and Restore
          • Back up Gmail
          • Item-Level Restore from Google Drive Backup
          • Back up Contacts
          • Back Up Calendar
          • Back Up Shared Drives
          • Retention Policy in Google Backup
  • Restore Backup Data
    • File-Level Restore
      • Step 1 - Select a Backup Storage
      • Step 2 - Specify the Plan Name
      • Step 3 - Select Data to Restore
      • Step 4. Select Restore Point
      • Step 5 - Select Files to Restore
      • Step 6. Destination
      • Step 7. Specify the Encryption Password
      • Step 8. Schedule Your Restore Plan
      • Step 9. Email Notifications and Event Log Settings
      • Step 10 - Check Network Shares
      • Step 11 - Save and Run Your Restore Plan
    • Image-Based Backup Restore
      • Step 1. Select Backup Storage
      • Step 2. Plan Name
      • Step 3 - Choose Data to Restore
      • Step 4 - Select a Restore Point
      • Step 5. Restore Type
        • Restore to Physical Disk
        • Restore to Virtual Disk
        • Restore to Amazon EC2 Instance, EBS Volume or AMI
          • Enable EC2 on your Amazon Account
          • Granting Required EC2 Permissions
          • Restore to Amazon EC2 Instance
          • Restore to Amazon Machine Image (AMI)
          • Restore to Elastic Block Store (EBS) Volume
        • Restore to Azure Virtual Machine or Data Disk
          • Restore to Azure Virtual Machine
          • Restore to Azure Data Disk
        • Restore to Google Cloud Instance, Image, or Disk
          • Restore to Google Cloud Instance
          • Restore to Google Machine Image
          • Restore to Google Data Disk
      • Step 6. Specify the Temporary Instance
      • Step 7. Select Partitions
      • Step 8. Destination
      • Step 9. Specify the Encryption Password
      • Step 10. Schedule Your Restore Plan
      • Step 11. Notifications and Logging
      • Step 12 - Check Network Shares
      • Step 13 - Save and Run Your Restore Plan
    • VMware Virtual Machine Restore Plan
    • Hyper-V Restore/Step 1. Select Backup to Restore
      • Step 2. Plan Name
      • Step 3. Type of Data
      • Step 4. Select a Restore Point
      • Step 5. Restore Source
      • Step 6. Restore Type
        • Select Virtual Disks
        • Restore Options (Destination)
        • Glacier Smart Restore (Optional)
        • Restore Virtual Machines As
      • Step 7. Encryption Options
      • Step 8. Schedule
      • Step 9. Pre-/Post Actions
      • Step 10. Notifications and Logging
      • Step 11. Check Network Shares
      • Summary
    • MS SQL Server Database Restore
      • Step 1 - Select a Backup Storage
      • Step 2 - Specify the Plan Name
      • Step 3 - Choose Data to Restore
      • Step 4. Select a Restore Point
      • Step 5. Select a SQL Server Instance
      • Step 6. Specify the Source Databases
      • Step 7 - Specify the Target Databases
      • Step 8 - Specify the Restore Options
      • Step 9. Specify the Encryption Password
      • Step 10. Schedule Your Restore Plan
      • Step 11. Customize Email Notifications and System Log Settings
      • Step 12 - Check Network Shares
      • Step 13 - Save and Run Your Restore Plan
    • MS SQL Server Backup Files Restore
      • Step 1 - Select a Backup Storage
      • Step 2 - Specify the Plan Name
      • Step 3 - Choose Data to Restore
      • Step 4. Select a Restore Point
      • Step 5. Specify the Source Databases
      • Step 6 - Specify the Restore Options
      • Step 7. Specify the Encryption Password
      • Step 8. Schedule Your Restore Plan
      • Step 9. Customize Email Notifications and System Log Settings
      • Step 10 - Check Network Shares
      • Step 11 - Save and Run Your Restore Plan
    • Microsoft Exchange Data Restore
      • Item-Level Restore in Microsoft Exchange
      • Restore Microsoft Exchange Files/Databases
        • Step 1 - Select a Backup Storage
        • Step 2 - Specify the Plan Name
        • Step 3 - Choose Data to Restore
        • Step 4. Select a Restore Point
        • Step 5 - Specify the Restore Destination
        • Step 6. Specify the Encryption Password
        • Step 7. Schedule Your Restore Plan
        • Step 8. Notifications and Logging
        • Step 9 - Check Network Shares
        • Step 10 - Save and Run Your Restore Plan
        • Update the Exchange Server Database
Powered by GitBook
On this page
  1. Backup Format Overview
  2. Legacy Backup Format
  3. Hyper-V VM Backup (legacy)/Step 1. Backup Route

Step 6. Compression & Encryption Options

PreviousStep 5. Select Virtual DisksNextStep 7. Retention Policy

Last updated 11 months ago

Specify compression and encryption options.

  • To compress your backup, select Enable compression check box

  • To enable AES encryption, select Enable encryption check box, then specify the encryption algorithm and the encryption password

If you selected Save your backup plan configuration to the destination storage check box on Plan Name wizard step, this configuration file will not store the encryption password for security reasons, so keep this password elsewhere to be able to restore the backup's contents afterward.

Note that if you change any of the encryption settings (algorithm or password) for the existing backup plan, a full backup will be executed on the next backup plan run

  • To enable the server-side encryption, select the Server Side Encryption check box.

Note that this feature is available only if you selected Amazon S3 as the cloud storage for your backup destination.

Once the Server Side Encryption check box is selected, specify the access parameters:

  • Use the Amazon S3 Service master key. Select this option, to allow Amazon S3 to decrypt the data for anyone granted with the permissions to access this data in the cloud.

  • Use the Amazon key Management Service master key Select this option to allow Amazon S3 to decrypt data for anyone granted with the permissions to access this object in the cloud along with permissions to use a specified master key.

  • Specify the Amazon S3 storage class for your backup plan. The following storage classes are available:

    • Standard

    • Intelligent-Tiering

    • Standard-IA

    • One Zone-IA

    • Glacier

    • Glacier Deep Archive

Microsoft Azure Blob Storage

The following settings are available:

  • Archive Blob Storage. Select this option to use the Archive Blob storage class. This is a low-cost storage option for infrequently accessed data. Opposed to Hot and Cool storage tiers, data retrieval from the Archive Blob storage takes up to several hours.

  • Cool Blob Storage. Select this option to use the Cool Blob storage class. This storage tier has lower storage costs and higher access costs compared to hot storage. This tier is intended for data that will remain in the cool tier for at least 30 days.

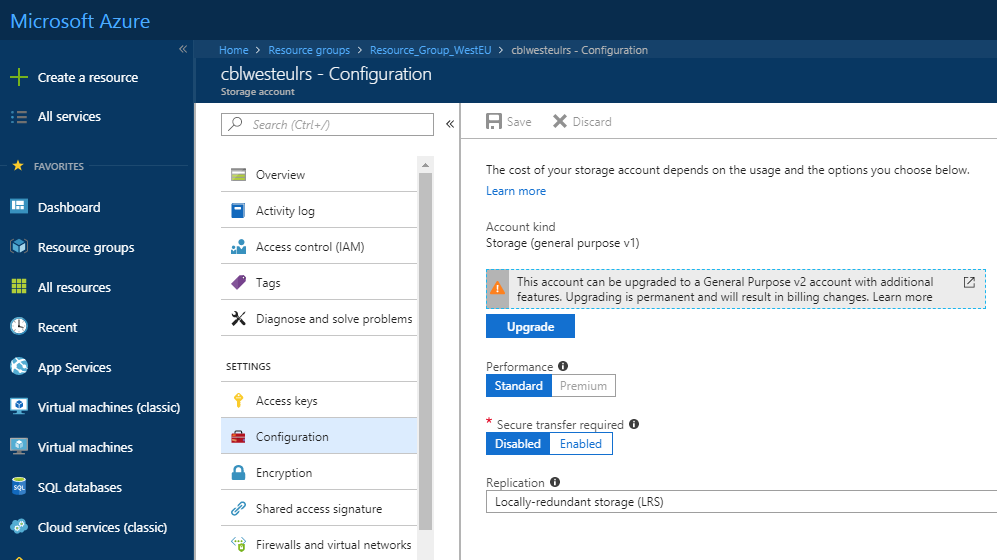
This feature is only supported for General Purpose v2 Azure accounts. If you are using another kind of account, you need to upgrade your account to be able to use this feature.

Be aware of additional charges and increased blob access rates in case you upgrading your Azure account.

If you selected Microsoft Azure as destination storage for your backup, you can specify the settings.

See the following document to learn more about the difference between Azure storage tiers: .

Azure Blob Storage
Azure Blob Storage - Hot, cool, and archive storage tiers