
Get Started with Backup for Microsoft 365 / Google Workspace
This chapter describes the first steps for creating your Microsoft 365 / Google Workspace backup. Read this to get your first impression on how it works:
Sign In for Microsoft 365
Login into Your Microsoft 365 Account
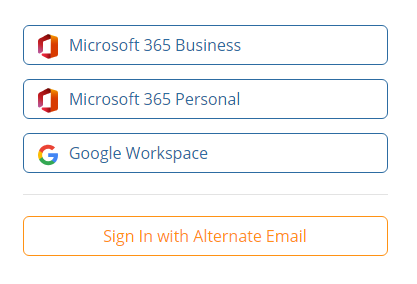
Sign In for Google
Login into your Google Workspace Account
Configure Trusts for Google Backup
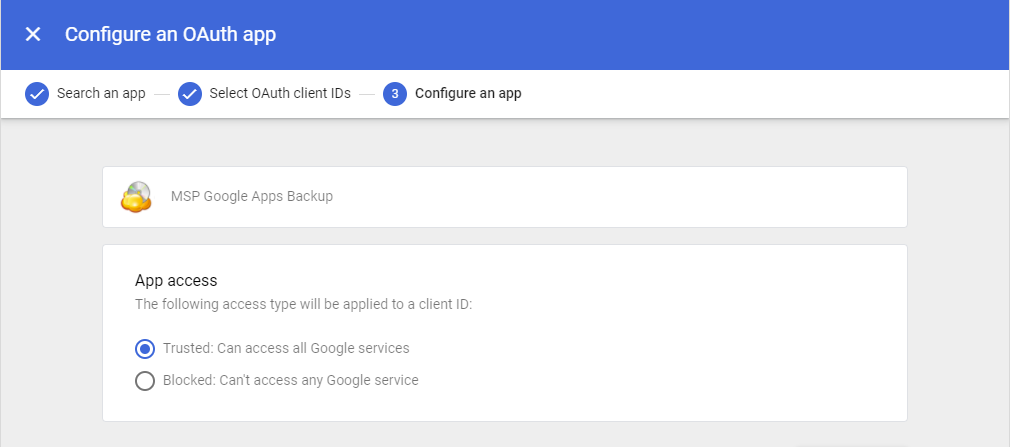
Configure trusts for apps.mspbackups.com requested by Google as described:
Sign in to https://admin.google.com/ with your super administrator.
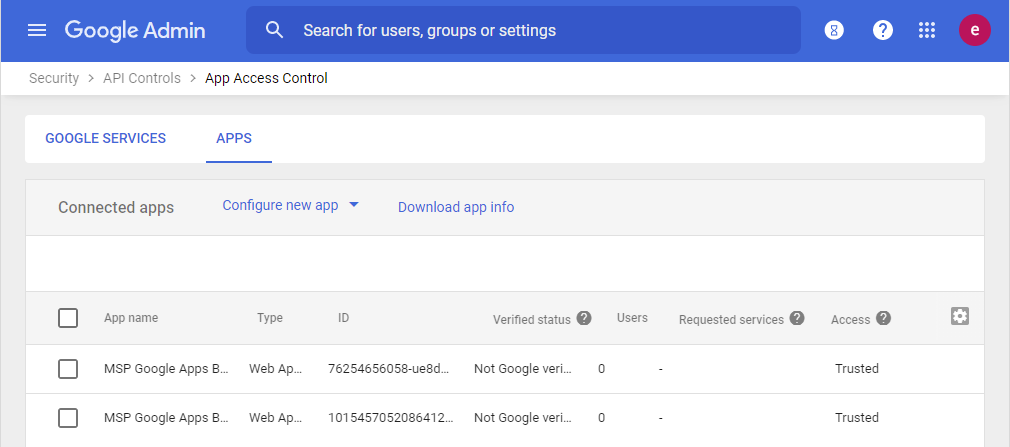
Click Main Menu > Security > Access and data control > API Controls > Manage Third-Party App Access
Add two MSP Google Apps Backup web applications with the following OAuth Client IDs to the trusted applications: 101545705208641292657 76254656058-ue8d5fkuicrfjjhd8c1qngd2goaq3ngs.apps.googleusercontent.com
The following access type should be selected for both applications: Trusted: Can access all Google Services
After you have added both applications you can see them in Connected apps grid with Trusted status
Configure Your Administrative Account
To start working with Backup for Microsoft 365 / Google Workspace, configure your administrative account:
Open Dashboard
In user menu select My Account
In Contact Info area provide your contact data
In Set up alternate email area add an alternate email. A strong password for alternate email is required. We will send an email message to specified alternate email for verification purposes. To confirm your alternate email address, please click on the provided link or copy and paste the provided URL in a new browser window.
It is recommended to turn on Two-Factor Authentication (2FA).
In Set up storage area click edit icon to add your storage account
Configure a storage account to create your backup destination
Select your storage provider in Storage Type field
Complete the provided form. Required data depends on your storage provider requirements.
Click Test button if you want to check whether you have access to the storage. You will see Successfully connected in case your access is confirmed.
Once you are done with editing, click Save and confirm your settings.
Long-Term Storage Usage
Long-term (сold) storage classes are not supported. If you make decision to use these classes, you are responsible for all transitions and selection of long-term storage classes. We also are not responsible for manipulations with the storage by the user and for the costs associated with these operations.
In case your storage destination is a long-term one (this can be S3 Glacier, S3 Deep Archive, or Azure Archive storage classes), note that these storage classes by design have several limitations.
Lingering retrieval time of a backup content (depends on storage provider). Thus, the restore plan that requires data retrieval from the cold storage classes can take up to 48 hours (for AWS Glacier Deep Archive storage class)
Retrieval costs. Basically, the data retrieval operations are not free and can be costly depending on the retrieval type and the amount of data to be restored.
Manage Licenses
Product comes with 15 days trial with limited 3GB storage limit for assessment purposes. As soon as trial period ends or storage limit is exceeded you will need to purchase a subscription for every user you want add to backup project. In case you use Personal product edition you are the only user of this product. In case you use Business product edition, check whether you have enough available licenses for your users. You can see list of users in the grid on Users. Select the subscription plan you need on Payments. The following plans are available:
Premium 1 month
Premium 6 months
Premium 1 year
Select the required plan and click Subscribe to proceed with payment. You can request a discount for non-profit, educational projects.
Add Users for Business Product Edition
All users included in your domain appear in the user grid.
To Access User grid:
In the horizontal menu bar, select Users.
In the actions menu to the right click Sync Domain to see the up-to-date list of users.
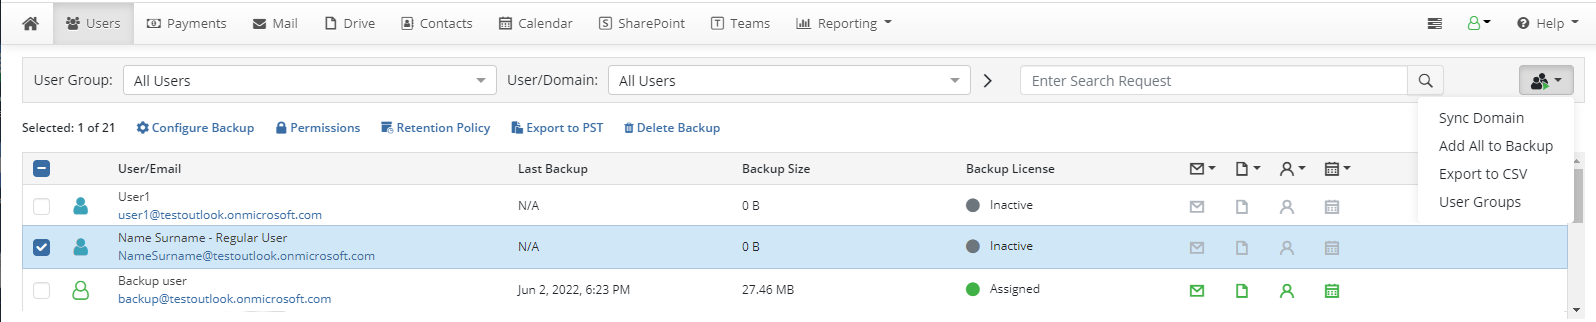
Select the users you want to add to the backup and restore routines
Enable backup for the selected users on the pane to the right.
Click Add All to Backup to add all enabled users to the backup and restore routines.
Configure Your Backup
You can configure your backup services using Configure Backup button.
In the main menu, switch to the home tab.
Click Configure Backup button.
Select the Microsoft 365 / Google Workspace service you want to back up, then turn the backup for this service on. By default, the backup in turned off for all services.
Sign in to the product as admin
Grant required permissions for the application, as requested by Microsoft Office or Google.
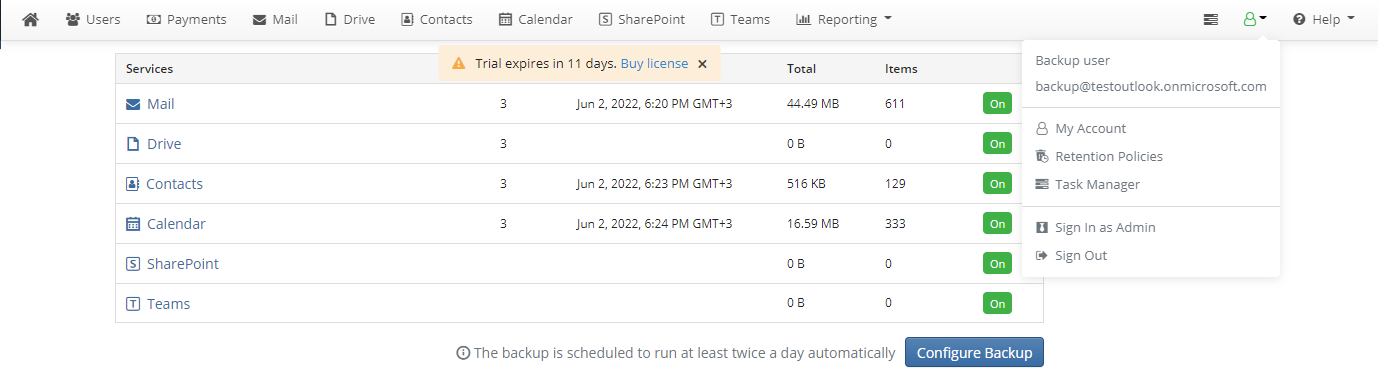
By default, the backup is scheduled to run at least twice a day automatically.
Backing Up By Service
Backup for Microsoft 365 / Google Workspace enables backup jobs separated by service. To select services to back up, open the control panel, then click Configure Backup. Select services required to back up for the user, then click Save.
To apply backup configuration to all enabled users, select Apply to enabled users check box below the backup configuration area
Your basic backup configuration is ready. The backup is scheduled to run at least twice a day automatically.
Last updated